In December I briefly described a quick method for vectorizing pixels with the Live Trace feature in Adobe Illustrator.
In this tutorial you'll take almost the same steps in order to convert a Photoshop Brush object to an Illustrator brush file.
1) You'll need a brush set file and load it in adobe photoshop. In this case I'll use an Urban Scrawl Brush set for Photoshop available here.
 2) Load the brush (.arb) file in, by double click or dragging it into Photoshop.
3) Create a new document (white background, resolution - 200 ppi).
4) Select the brush tool, and chose a shape from the brush set that you just loaded. Change the opacity too 100% and select black for forground color. (use the screenshot below as reference)
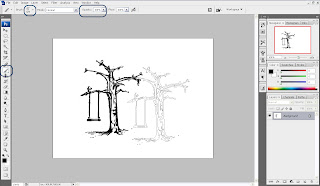
5)After selecting your shape click twice on the screen with the brush tool and save the document as jpeg or gif.
Now comes the second part - Bringing the image in Adobe Illustrator and Vectorizing it.
6)Load Illustrator and create a new print document. Then go to File>Place and choose the image that you created in photoshop.
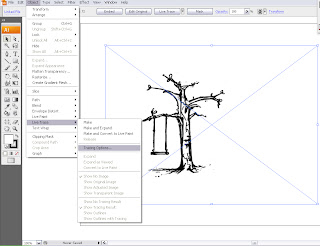
7) Select the image and go to Object>Live Trace>Tracing Options...
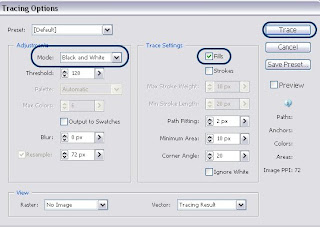
 8) In the Live Trace Dialogue Box make sure that you choose black & white mode and put a checkmark on Filles and click on Trace.
 9)Now you see the vectorized preview of the shape that you want to be your brush. But to use it as a regular vector object you have to expand it. Go to Object>Expand and then Object>Ungroup
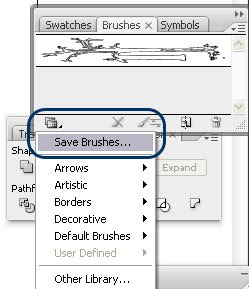
11) The last step is to save your vector as a brush file. Open your brush palette (F5) select your vector object and drag it into the bursh pallette. A "new brush" window will popup, select "New Art Brush, click OK and then name it. In the palette you can se other brushes, that are loaded in Illustrator by default. Delete them from the palette (don't worry they are not going to be removed) by selecting them and clicking on the trash can. Leave only the brush that you've just created and go to Save Brushes... (look ath the image below) and name your file.
 Well that's it. I Hope I didn't shorten the process a lot.


Thank You download program Illustrator CS6
Trả lờiXóa